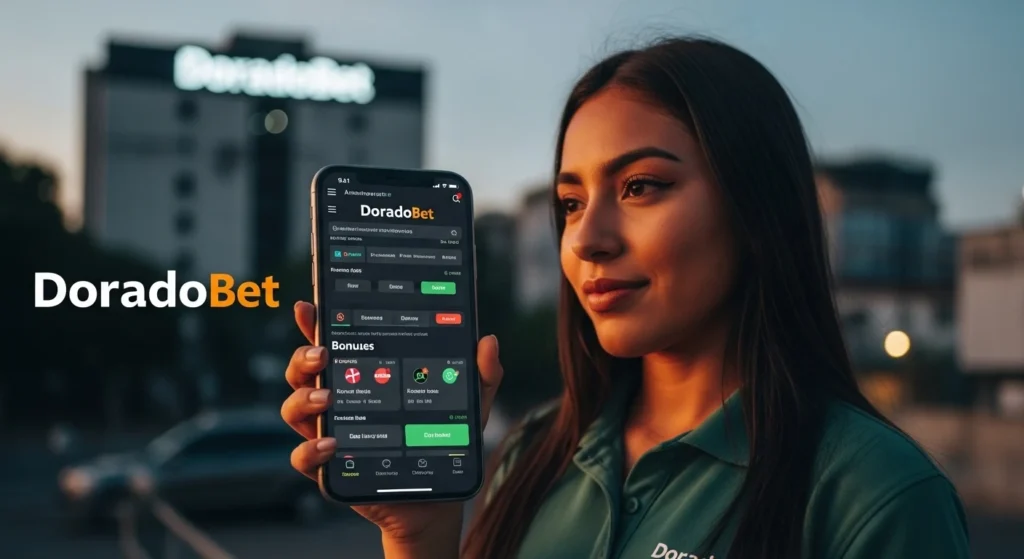
|

|
0. Introduction
1. Quick start
2. Settings
2.1 General settings
2.2 Views settings
2.3 Mail setup settings
2.4 Mail archiving settings
3. Examples of use
3.1 Mail server rejection and delivery problems
3.2 Dictionary attacks (smtp authentication hacking)
3.3 (Open) mail relay misuse
3.4 Mail server load problems
3.5 Routing problems
3.6 Real-time feedback
3.7 Lost passwords
3.8 Error responses from mail servers
4. Tips & Tricks
4.1 Limitations
4.2 Minimizing memory use
4.3 Maximizing performance and responsiveness
5. Other useful products
0. Introduction
MailMonitor is a program enabling you to monitor incoming and outgoing mail traffic to and from you mail server and clients. It tracks, displays and logs incoming and outgoing SMTP sessions, POP sessions and sent and received E-mails. It can store incoming and outgoing e-mail in a separate directory independent of mail server and clients. Finally, it keeps a trace of all e-mail related session traffic (at packet level). This enables you to explore in depth what is going on in your e-mail environment.
These features
make MailMonitor a valuable tool for tracking your e-mail flow your e-mail environment
in case of problems with sending or receiving e-mail. Watch for
unsolicited mail forwarding (spammers that use your mail servert to relay their messages) and a host of other
e-mail server related problems.
1. Quick start
After installing the program, there are a couple of settings you should check before using the program. The MailMonitor settings dialog can be reached by pressing the [Settings…] button from the main screen. Go to this settings dialog and check the following:
Under
General
:
1. Under choose adapter choose the adapter (if you have more than one) where you want to monitor traffic;
2. Set the data root directory that indicates where log files and intercepted e-mails are stored.
Under Mail Setup
:
1. Check SMTP Port and POP3 port and make sure these are the ports your e-mail server is using to communicate; 2. It would be a good idea to fill in internal mail domains and local IP range as well as these enable MailMonitor to assess if traffic is local or remote although this is not necessary.
That’s it! Click on Start Watch to start the monitoring process.
2. Settings
The MailMonitor settings dialog can be reached by
pressing the [Settings…] button from the main screen. The settings dialog
contains several tabs where you can adjust or enable features.
2.1 General settings

Choose adapter
This is the network adapter which the program should monitor. If you have more then one adapter, choose the one you wish to monitor.
Scan normal IP traffic
This enables MailMonitor to scan normal IP and TCP traffic. This switch should normally bee activated.
Scan VPN tunnels
In some situations (mostly with DSL connections) you will not be able to see all traffic unless VPN traffic scanned. Normally, this switch should be disabled. If you suspect you are not seeing all traffic, you can switch this on and see if things improve. Data directory root
The data directory root is the location where the various log files will be kept. If you have mail archiving enabled, MailMonitor creates a directory “mail” at this location where all the intercepted mail will be stored.
Force the program to respond to user input every <n> packets
If this setting is enabled, the program will give time to the user interface to respond to user input at least once every packets. If you experience that the program seems to freeze when traffic is heavy, enable this setting.
Stop monitoring the packet stream after <n> packets have been received. If traffic is particularly heavy in your
environment and MailMonitor freezes because of this, you can enable this
setting to scan a fixed number of packets, and then stop monitoring. This is
particularly effective when you are being bombarded with e-mail and want to
find out what is going on.
2.2 Views settings

SMTP
session view /
POP3 session view
The SMTP and/or POP3 session view enable the program to track and display SMTP and/or POP3 sessions. Mail view
Keeps track of emails (incoming and outgoing) that pass your mail server. The mail view displays those messages in the interface.
Data view
The data view shows the raw network packet trace. Mark “Show header and data” if you want to see header information. To display only the ASCII data of each packet, select “Show data only”.
Log to file If this feature is enabled for any of the above views, a log is kept on disk in the data root directory (see general settings). The name of the log is indicated between round brackets. A new log file is started each day. For example, for the SMTP view on November 13, 2003, the log file would be named “SMTP sessions 10-13-2003.log” .
Flush a data view when memory for data exceeds
The program will flush the memory for a data view (there are three) when the total amount of used memory exceeds this value. The data view and memory are then cleared. This allows you to control how much memory MailMonitor will maximally use when running.
Flush a data view when the number of items exceed
The program will flush the memory for a data view (there are three) when the number of items (lines/sessions) in the data view exceeds this value. The data view and memory are then cleared.
Note: you are well advised to enable only features you
require. For example, if you are only interested in your servers SMTP traffic,
disable POP3, mail and data views and logging. This allows the program to be
more responsive and keep the amount of missed packets by the program at a
minimum. The more features you have enabled, the slower the program operates
and the greater the chance it will miss some packets.
2.3 Mail setup settings

POP3 port
The port at which MailMonitor should listen for POP3 traffic. Usually port 110.
SMTP port
The port at which MailMonitor should listen for SMTP traffic. Usually port 25.
Internet mail domains
In order for MailMonitor to recognize mail traffic, it is useful to indicate the name and ip address of your mail server.
Or more than one if you have several. MailMonitor can than distinguish between local and remote sessions.
Local IP range
In order for MailMonitor to recognize mail traffic, it is
useful to indicate your local ip range here. MailMonitor can than distinguish
between local and remote sessions.
2.4 Mail archiving settings

Intercept and archive mail Enable this
setting to catch and store any e-mail passing your mail system. The e-mails are
stored in the “mail” directory located in the data root directory (see general
settings). You can choose what types of e-mail you want to store and what types
should be ignored.
3. Examples of use
MailMonitor intercepts and
analyses the e-mail traffic on your network. Most mail servers lack monitoring capabilities and give
insufficient information about what is exactly going on in your mail
environment. MailMonitor was made to remedy this shortage. A scanner at packet
level, it will intercept the complete
server to server (or server to client) conversation. The
information is displayed in a meaningful format. This section describes a
number of common situations in which MailMonitor can be used in
order to provide a solution for the problem.
3.1 Mail server rejection and delivery problems
Scenario: Maybe you have made
changes to your mail server recently. Suddenly you have problems with mail
deliveries or your e-mail gets rejected. Could it be that the DNS-entry for your
mail server is incorrect? Or could it be that settings in your mail server
software cause rejections? Maybe you haven't even changed anything and e-mails
get rejected. It might be that your mail server is blacklisted. How do you find
out? Solution: If mail gets rejected or is not properly
delivered and you want to find out what causes this, you have to inspect the
smtp sessions going on between your server and other servers (or
clients). Actions: Start MailMonitor and go to the settings
dialog (via the button in the main interface). In the tab views, look
at active data views & logging. Check smtp session view
and Data view (show header and data). You can check the log files
if you want a log written to disk, otherwise don't use logging. Uncheck any
other views. Press Ok and the setting dialog disappears. Now, start the monitor
by pressing Start Monitor in the main interface. MailMonitor will start
to listen and will keep a trace of the mail traffic in the Trace
tab and keep a log of all smtp sessions in the SMTP sessions tab. A
number of variables such as ip numbers and user names and any errors can be
viewed directly in the SMTP sessions list view. Click on a sessions to
see the complete session conversation in the trace field below. Here you can see
the complete server to server (or server to client) conversation. Now find
the session that reflects the problem you are experiencing. If you have no idea
which one to inspect, look at the Error column and inspect any session
where this field is filled. Alternatively, inspect all sessions
and scan Error column
and trace (click session to view) for any problems. If you've found the
problem and you've seen what goes on, usually the solution will be apparent as
well. For example, in a session trace you might see a message saying 'relaying
denied'. If this shouldn't be the case for the particular user that is trying
this, you should have a look at your mail server software (are users
allowed to
relay?).
3.2 Dictionary attacks (smtp authentication hacking)
Scenario : Your mail server is busy
but mail isn't being delivered and it is not being send too. If you are
experiencing a dictionary attack (trying to break in to your mail server with brute
force to discover password of users) and your mail server does not show you
a pop and smtp trace more sophisticated to help
you understand what is going on. Spammers use this to gain entrance to your
mail server, and your server needs an authenticated user before relaying a message. They
often try this by initiating pop sessions to discover user names and passwords. Many
mail server do not allow you to see the pop trace so you
can't see what is going on. Solution: Follow the smtp
sessions to your mail server and pay attention to authentication. If there are
a lot of authentication attempts (with user names and passwords that do not
look authentic) without mail transfers in the session, you are experiencing a
dictionary attack. Actions: Start MailMonitor and go to the settings
dialog (via the button in the main interface). In the tab views, look
at active data views & logging. Check smtp session view
. You can check the log files
if you want a log written to disk, otherwise don't use logging. Uncheck all
other views. Press Ok and the setting dialog disappears. Now, start the monitor
by pressing Start Monitor in the main interface. MailMonitor
will start to listen to mail traffic. Switch to the smtp view. Make sure you
can see the authentication column. Watch as sessions go by for
activity in this column. If you experience a dictionary attack, this won't
take long. If you are positive you are experiencing a dictionary attack, look
at the ip address where the attack originates from. Next, prevent this ip
address from accessing your server (block it in your mail server setup or in
your fire wall).
3.3 (Open) mail relay misuse
Scenario: Your mail server gets bogged down and
you find your outgoing mail queue is filled with a
couple of thousand e-mails. Looking at the mails in the queue, you suspect a
spammer is using your mail server to relay his spam. If you do not know
how the spammer has gained access to your mail relay, the only option that remains is
giving all your users new passwords. Needless to say, that a situation you don't want
to get into. Solution: You want
to find out what ip address is spamming you, what account is used and if the
relaying comes from within your own network or from the outside. You have to
inspect the smtp sessions until you have found one or more where e-mail is
being relayed by the spammer. Then check how the spammer uses your server to
relay mail and take action to
block him. It might be that one particular existing mail account is being misused, but
it can also be that a hacker has created an account on your system
especially for his relaying purposes. Actions: Start MailMonitor and go to
the settings dialog (via the button in the main interface). In the tab
views, enable smtp sessions, mail view and
data view. Press Ok and the setting dialog disappears. Now, start the
monitor by pressing Start Monitor in the main interface. MailMonitor
will start to listen to mail traffic. Then sift through the smtp sessions and
find a session where the spammer is relaying e-mail through your mail server.
You can see this by clicking on a session and check if the trace (below)
contains the content of the e-mail being relayed. Once you have found such a
session, take a look at the source and destination ip addresses. One will be
your mail server. The other is the ip address of the spammer. From the ip
address you can asses if the relaying is done
from inside your network or from the outside. Next take a look at
the authentication column: is the spammer using authentication to
get access to relaying? If so, you find the user name and password in this
column. Now that you not what account is used, change the password for that mail
account. If authentication is not used, this might indicate that anyone can use
your server to relay e-mail. It might be a wise idea to set up authentication to
prevent this! (To check vulnerability for spam relay on your mail
server, use RelayCheck which is available at http://www.digiarch.org.) If
authentication is not used, check the trace to find out how the spammer got
access and remedy this leak if possible. If the spammer attacking your
mail server is really serious about his business it might be that there is so
much mail traffic that MailMonitor gets locked down, and you cannot use the
interface anymore because it is busy. In such a case, go to the settings dialog,
in the general tab, check stop monitoring the packet stream
after <n> packets have been received. Set <n> to a sensible number of packets
(perhaps 250). Now start the monitoring process again. MailMonitor
will scan the first 250 packets of your mail traffic, and then stop the
monitoring process again. This gives you the opportunity to inspect the
results. If you do not get the results you are after, simply try again
(start monitor) or increase the number of packets. Persist until you
have trapped the spammer.
3.4 Mail server load problems
Scenario: Your mail server gets bogged down. You
are not sure what is causing this. It could be that users initiate to many pop
sessions, you can be receiving large amount of spam, a kiss of death might be
going on or a spammer may use your open
relay. Solution: You need to take an all over view of your
mail server activities. Check smtp and pop traffic and assess what session types
are keeping your mail server busy. Once that is clear, check what kind of users
or servers initiate these processes. Actions: Start
MailMonitor and go to the settings dialog (via the button in the main
interface). In the tab views, enable smtp sessions, pop sessions,
mail view and data view. Press Ok and the setting dialog
disappears. Now, start the monitor by pressing Start Monitor in the main interface.
MailMonitor will start to listen to mail traffic. Switch from view to view.
Note which views show a lot of activity. Stop the monitor and inspect the
sessions to see if any particular server or user is especially active.
From the sessions details and trace you will get an idea of what is going. For
example, to much pop sessions will become evident from the pop
sessions view. Find out what users pop a lot and take
measures.
3.5 Routing problems
Scenario: The more complex
your mail setup is (multiple servers, multiple domains, multiple
NIC's and ports), the bigger the chance you run into routing
problems. Typically you will be having trouble receiving mail
from other servers on the internet, users can't pop your mail domains or mail
can't be delivered. Solution:
You need to get an idea of the mail flow in your system, how your e-mail is
being routed from server to server, via script and ports, et cetera.
Actions: Start MailMonitor and go to the settings
dialog (via the button in the main interface). In the tab views, look
at active data views & logging. Enable
smtp sessions and Data view (show header and data). Press Ok and the setting dialog
disappears. Now, start the monitor by pressing Start Monitor in the main
interface. To discover your routing problem, send an e-mail to your
server and use the smtp and trace view to trap the e-mail flow. See at what ip
address it arrives and where it goes next. If you use multiple ports, don't
forget to change the smtp port setting in the settings dialog (trace one port
after the next, or use two MailMonitors). Once you have got an idea of
the mail flow you can start to make changes to your setup in order to remedy
the problem.
3.6 Real-time feedback
Scenario: While you are not experiencing
mail problems, you want to keep a look out if things are running normally in
your mail environment. As a precaution to avoid problem, or as a check on your
mail server when you have made changes. Solution: Monitor
mail traffic in general and scan for errors and
anomalies. Actions: Start MailMonitor and go to the settings
dialog (via the button in the main interface). In the tab views, enable all views (you might keep logging
disabled). Press Ok and the setting dialog
disappears. Now, start the monitor by pressing Start Monitor in the main interface.
In the smtp sessions view, pay special attention to the
authentication, errors and status columns. Inspect
sessions with errors and sessions where the status is other than 'closed' (if
it says 'connected' or 'unknown' it might indicate a problem, but it can also
be that not all packets were received). In the pop sessions view,
also pay special attention to the errors and status
columns.
3.7 Lost passwords
Scenario: a user has lost his password
and needs it for example to use mail at home. Solution:
Discover the password. Actions: To discover the password, start MailMonitor and go to the settings
dialog (via the button in the main interface). In the tab views, enable the
pop sessions view (you might keep logging disabled). Press Ok and the setting dialog
disappears. Now, start the monitor by pressing Start Monitor in the main interface. Have the user
check his email and watch the pop sessions. From the user and
password columns you can discover the
password.
3.8 Error responses from mail servers
Scenario: There seems to be a
problem but you can't see server to server communication to inspect
what might be going wrong. Connections can be refused by your mail
server, relaying might be denied possibly causes by IP screening
(ip addresses get refused) of your mail server or invalid EHLO's
(reverse lookup failure by your mail server). Another example is blacklisting.
If your mail server has an internal blacklist, it can be that e-mail gets
accepted but can't be popped by a user. The user will complain he doesn't
receive the mail he expected. Another example is when your mail server
uses a blacklist on the internet and rejects mail from certain domains
because they are on the blacklist. Solution: inspect the
smtp trace and see at what point the session
fails. Actions: Start MailMonitor and go to the settings
dialog (via the button in the main interface). In the tab views,
enable the smtp sessions view (you might keep logging disabled). Press Ok and the setting dialog
disappears. Now, start the monitor by pressing Start Monitor in the main interface.
Switch to the smtp sessions view, and inspect smtp sessions,
especially those with errors. Click on a session and view the trace (below).
Now you can see what is happening and what might be wrong.
4. Tips & Tricks
4.1 Limitations
MailMonitor intercepts and analyses the network traffic over the network card on the computer
it is installed on. As with any software that analyses network traffic, it can
slow down and miss packet traffic when network traffic is heavy. This is
dependent on the speed and memory capacity of the machine where MailMonitor is
installed on, and on the volume of traffic passing it.
There are a number of ways to
avoid the slowing down of MailMonitor or your mail server. You should first
make sure that MailMonitor analyses only the type of mail traffic that meets
your requirements. If for example you do not need to see separate e-mails and
don’t need to log each e-mail that passes your server, do not enable the
program to do so. Other solutions are to install MailMonitor on a different
machine than your mail server, particularly if your mail server is very busy
or to run MailMonitor only in case you need to solve a particular type of
problem with your mail server.
4.2 Minimizing memory use
MailMonitor has a few options that let you control the
amount memory the program uses while running. While
MailMonitor runs, it stores mail traffic (packets) in memory (RAM) and on
disk as it comes in.
Depending on what you have enabled in
Settings|Views, MailMonitor stores log files on
disk and buffers all session traces (smtp, pop views), all e-mails
passing the monitor (Mail view), and the complete packet trace (Trace
view).
The first measure you can take to minimize used up memory
is to disable all log files you do not need to be reviewing and to disable all
views you don't need. A good way to work is to disable all views and
then switch on the views you really need. If for example you do not enable the
Trace view, the amount of memory you save is roughly equal to the
total amount of mail traffic you receive in a certain amount of time (since
the trace comprises all of the packets coming through your mail
system).
Of course, you need to
have some views enabled to see what is going on. If you would let MailMonitor
run for longer periods of time, the memory needs of the program would be ever
growing. MailMonitor has the ability to purge memory when certain limits are
reached. In the settings dialog, see the Views tab under Data
view memory limits.
Flush on
memory Enable the flush memory
feature to limit each data view (smtp, pop and message views) to a certain
number of Mb's. If a view uses more than the set amount of data, it
clears itself. (Use the log file function in a view to have a permanent
reference of past data.) How much
memory you have to set here (Mb's) is a functions of the number of views you
plan to have active and the amount of RAM you want the program to use. Use 1 Mb
as a conservative setting. You can also monitor memory use with the
windows Task Manager and adjust accordingly.
Flush on number
of items Another way to limit memory use is to let the program clear a
data view (smtp, pop and message views) when a certain number of items
in that view are reached. Setting the number of items to 100 for example, will
have the data view clear itself if it reaches a 100
items.
4.3 Maximizing performance and responsiveness
As mail
traffic can become very busy, MailMonitor can become increasingly less
responsive to user input (See also under 4.1 Limitations). There is
little that can be done about the amount of traffic, but there are certain
ways to increase performance and responsiveness.
The first one is, just
as with memory use, to limit the number of active views. If for example you do
not enable the smtp view, MailMonitor will not analyse smtp related packets.
This speeds up the program. A good way to work is to disable all views
and then switch on the views you really
need.
To increase responsiveness, you can force
MailMonitor to respond to user input. To do this, go to
Settings|General. Under Packet stream handling,
enable Force the program to respond to user input. You can set the
number of packets that can be handled before the program handles user
input. A sensible setting would be 100. If you go below this number, you risk
a penalty in the performance of packet queuing and handling possibly resulting
in packet loss.
Another way to circumnavigate an irresponsive program
if traffic is heavy is to queue and handle a fixed number of packets where
after the monitoring process is stopped. The user can then
inspect the monitored results. MailMonitor supports the capture of a fixed
amount of packets. To do this, go to Settings|General. Under
Packet stream handling, enable Stop monitoring the packet stream
after <n> packets. You can set the number of packets that are
handled before the program automatically stops monitoring. Setting
the number of packets to a high number means you have to wait longer for the
program to stop. If the number is to low, you will not get the information you
where after. Using this feature is particularly useful in cases where
your mail server is being overloaded with information and it becomes difficult
to cope with the amount of
traffic.
5. Other useful products
While MailMonitor allows you to inspect many problems you might
encounter in your mail environment, it pays to check in advance if your mail
server is secure. RelayTest Pro (http://www.digiarch.org/relaytest.html)
tests whether your mail server is vulnerable to a host of relay tricks. It
gives tips and hits how to remedy the various defects you might encounter. It
also allows you to test you mail server directly by hand, as if you were
sending mail - but now you get to see the entire
conversation between RelayTest and your mail server. Visit
the RelayTest homepage for more
information.
|
Copyright Digital Architects, All rights reserved. |
|